23 Stunningly Easy DIY Messy Buns
Learn some ways to flaunt your locks in this trendy hairstyle and look on trend.
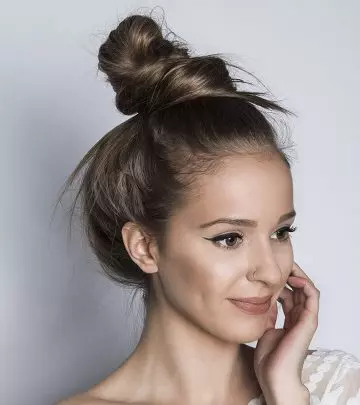
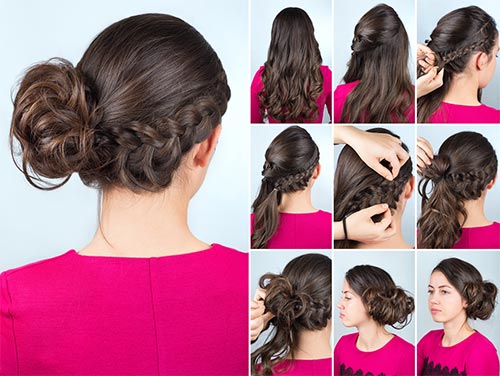
Image: iStock
When you were a kid, I’m sure your mother did everything she could to make sure your hair never looked messy. But now that you’re all grown up, messy hair is the trendiest look to sport!
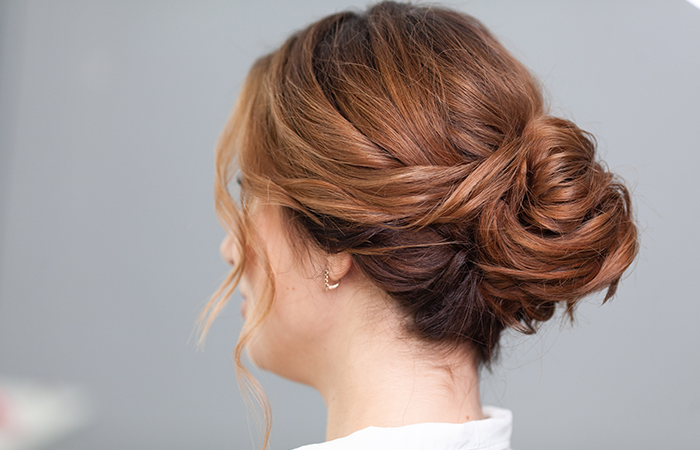
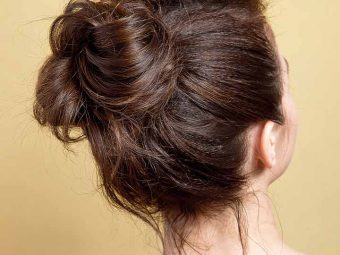
Messy hairdos are here to stay, and it hardly comes as a surprise. Messy hairstyles look so boho chic and effortless that it’s hard not to like them. They’re like that one cool kid in high school that everybody loves. Let’s talk about that one god-given hairstyle that, no matter what the event (even the gym), makes your hair look put together – the messy bun.
Meredith Boyd, Licensed Cosmetologist, says, “I love a beautiful messy bun for formal occasions. I created a stunning deconstructed messy low bun updo for Miss America 2016, Savvy Shields, for the American Music Awards using only hair string and zero bobby pins. It was so effortless, chic, and lightweight for the red carpet. I love when my clients can enjoy the evening and not have to worry about their hair and enjoy the moment!”
The best part about messy buns is that they give you the perfect I-just-got-up-and-I-look-this-awesome look in under 5 minutes! Read on to learn how to do a messy bun in 23 amazing ways and pick your favorite messy bun hairstyle among them!
 Before You Get Started
- Back brushing gives your messy bun a thick and voluminous look.
- Those with smooth straight hair can use a texturizing spray to add volume and bounce to their messy look.
- Use clear mascara to keep the pesky baby hairs in place.
- Curling your hair first can give your bun more volume and body.
In This Article
23 Incredible And Easy DIY Messy Buns
1. Messy Bun With Twisted Sides
What You Need
- Comb
- Elastic bands
- Hair pins
What To Do
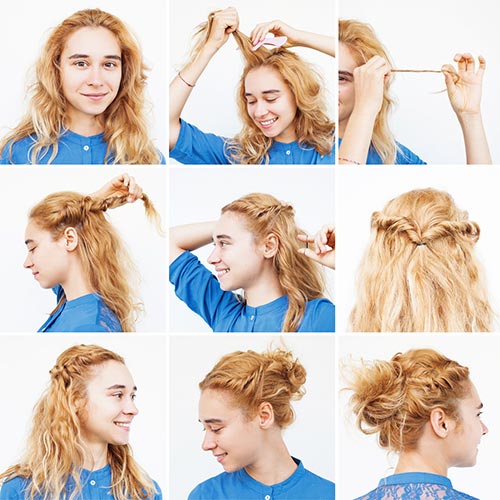
- Backcomb the front strands and divide the hair into three sections from the front to the back of the head.
- Take a two-inch hair section from the side and loosely twist it.
- Follow the same steps on the other side and secure the twisted strands behind the head with an elastic band.
- Once you have a half updo, gather all the hair and make it into a loose bun.
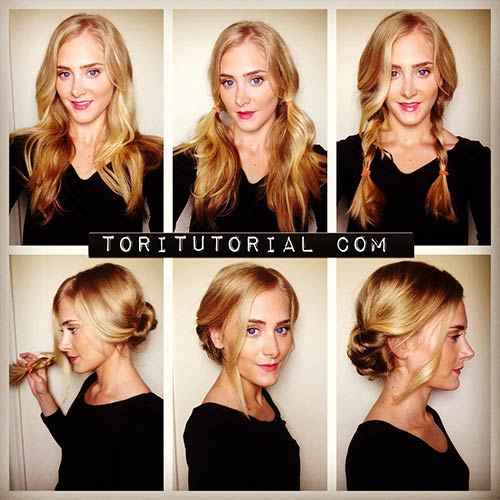
2. Messy Side Bun With Loose Braid
What You Need
- Comb
- Elastic bands
- Hair pins
- Hairspray
What To Do
- Divide your into two sections diagonally from the side. Secure the top section with a clip on the other side of the head.
- Start weaving a braid on the bottom section from the side to the back of the head.
- Secure the braid with an elastic band on the opposite side.
- Slightly pull the strands from the braid to loosen them to create a pancake look.
- Now, gather the top section and tie a looped side ponytail.
- Take several hair sections from the loose ends of the looped ponytail and tuck them over the looped section. Repeat until all hair sections are tucked.
Secure the bun further using hair pins (you may also use U-pins) and spritz some hairspray to keep the hairdo intact.
3. Messy Knot Bun
What You Need
- Comb
- Hair pins
- Elastic bands
- Hairspray
What To Do
- Divide your hair into two sections. Hold them, so they look like two pigtails.
- Tie both the sections in a knot.
- Take an elastic band and tie it below the knot.
- Divide the hair below the elastic band into two and tie it in another knot.
- Tie another elastic band under this second knot.
- The number of knots you need to tie depends on the length of your hair. If you have shoulder length hair, two knots should do. But if you have longer hair, you’ll need more knots.
- Fold the knots up and pin them in place, leaving the ends out to create a casual vibe.
- Tug the hair at the crown to add some volume at the top and make the hairdo look messier.
- Finish off with a spritz of hairspray to set the do in place.
 Quick Tip
4. Messy Sock Bun
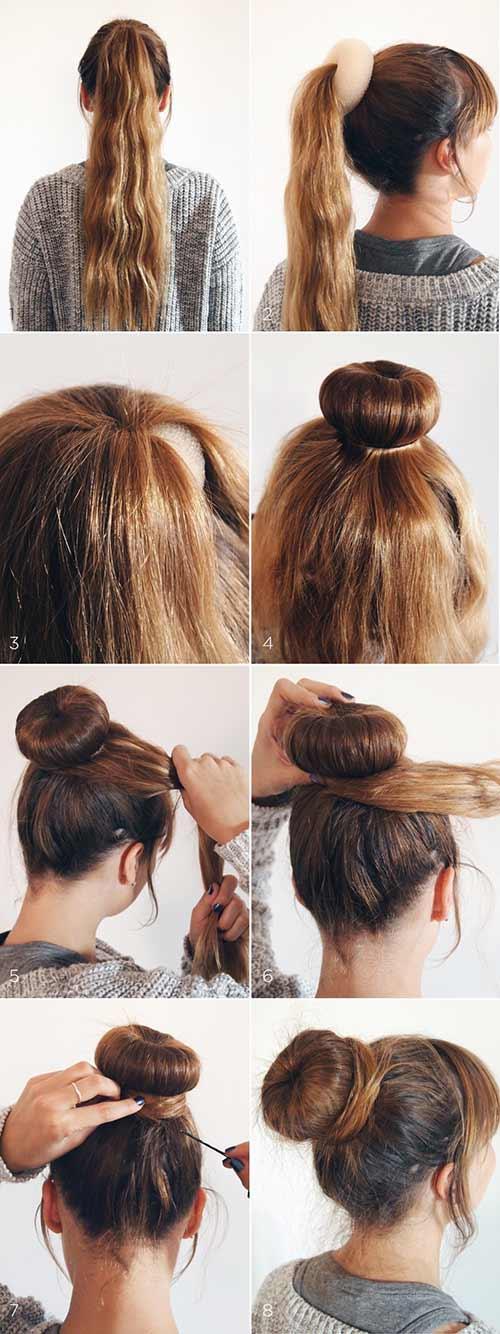
What Do You Need?
- Elastic bands
- Hair pins
- Donut band
What To Do
- Leaving out your bangs, tie your hair in a high ponytail using an elastic band.
- Insert the donut band at the base of the ponytail.
- Let your hair fall over the donut band. Arrange your hair, so it covers the band completely.
- Keep the covered hair in place by securing it with an elastic band.
- Twist the rest of your hair around the base of the bun and pin it in place to complete the messy updo.
5. Messy Wrap Around Bun
What You Need
- Elastic bands
- Hairpins
What To Do
- Tie your hair in a mid-level ponytail, leaving out some hair in the front.
- Take a small section of hair from the ponytail and wrap it loosely around the base, covering the elastic band. Make sure not to wrap the hair too tightly.
- Take another section of hair from the ponytail and wrap it around the previous section.
- Repeat the same until the entire ponytail has been wrapped into a bun.
- Sweep the front section of hair to one side (mimicking side-swept bangs). Comb it and wrap it around the base of the bun neatly. If you have short hair, you can pin this section just above the bun and finish off your casual hairstyle.
6. Messy French Fishtail Bun
What You Need
- Elastic band
- Hair pins
What To Do
- Take some hair from the front, slightly to one side. Divide it into two sections.
- Weave the two sections into a French fishtail braid.
- As you weave the braid, keep adding hair to it. Though the braid begins at the side, it will move towards the center of the crown.
- Pin the braid in place.
- Gather the rest of your hair, holding it in a high ponytail. Take an elastic band or a hair tie and pass your hair through it, but not completely.
- Twist the elastic band and bring it over to the other side. The top half of your hair should look like a bun.
- Take the lower half of your hair and wrap it around the bun.
- Pancake the bun to make it look bigger. Pin it at the sides.
7. Messy Double Knotted Bun
What You Need
- Elastic bands
- Hair pins
- Comb or brush
- Hairspray
What To Do
- Begin with washed and blow dried hair. Detangle your hair with a comb or brush.
- Part your hair down the middle.
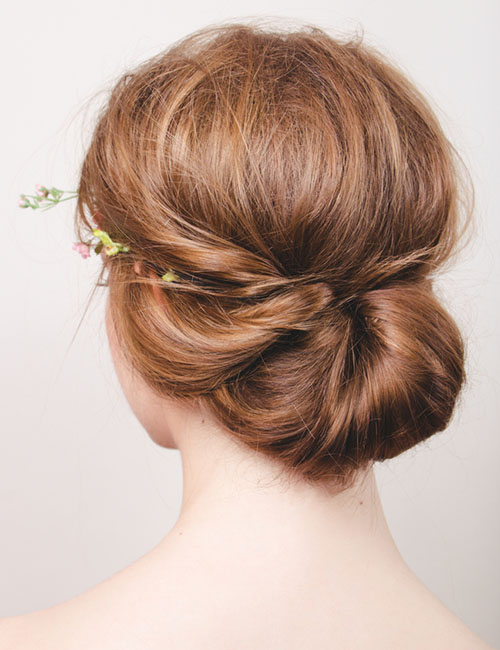
- Tie your hair in a low ponytail with an elastic band.
- Divide your ponytail into half, forming two sections: one on the right and one on the left.
- Tie both the sections in a knot. Make sure the knot is loose with some gap between it and the elastic band.
- Tie another knot under the first knot. If you have long hair, you can tie a few more knots.
- Secure both the knots by tying an elastic band under the second knot. This creates a knotted braid.
- Lift the knotted braid and roll it into a chignon.
- Secure the knotted bun with hair pins.
- Spritz on some hairspray to keep the hairdo intact for a few hours.
8. Messy Double Braid Bun
What You Need
- Comb
- Elastic bands
- Hair pins
- Hair bow
- Hairspray
What To Do
- Tease some hair at the crown by backcombing it. Comb the top of this section to neaten it.
- Gather all your hair and tie it in a high ponytail, leaving out only your bangs.
- Divide the ponytail in two. Weave each section into a regular three-strand braid.
- Pancake the braids. Don’t try to smoothen down the stray hair as you want the hairdo to be messy.
- Take one braid and wrap it around the base of the ponytail.
- Pin it in place.
- Repeat the same with the other braid.
- Spritz on some hairspray to hold it in place.
9. Messy Flipped-In Bun
What You Need
- Elastic bands
- Hair pins
What To Do
- Gather your hair and tie it in a high ponytail.
- Flip your hair over and pass it through the ponytail, just before the elastic band. Don’t pass it through completely.
- Wrap the lower half of the hair around the base of the bun and pin it in place.
- Pancake the bun to create a simple yet messy style.
10. Messy Low Side Bun
What You Need
- Comb
- Elastic band
- Hair pins
What To Do
- Comb your hair to detangle it.
- Gather your hair and hold it to resemble a low side ponytail. Leave out some hair in the front.
- Using an elastic band, tie the upper half of your hair in a bun, leaving the lower half to hang loose. The bun has to look messy.
- Wrap and pin up the lower half of your hair under and around the bun, allowing the ends to hang loose.
11. Messy Braid Bun
What You Need
- Comb
- Elastic band
- Hair pins
What To Do
- Comb your hair to detangle it. Part it how you generally do.
- Divide your hair into two sections.
- Weave each section into a loose braid. It can be a regular braid, a pull-through braid, or messy twists. Any braid works for this hairstyle.
- Align one braid along the hairline at the nape of your neck, so its end reaches the ear on the other side. Secure it in place using pins. If your hair is long, tuck the extra part within the aligned part of the braid.
- Repeat the same with the other braid.
12. Messy Braid Wrapped Bun
What You Need
- Elastic bands
- Hair pins
- Sectioning clip
What To Do
- Tie your hair in a high ponytail, leaving out the hair closest to the hairline at the back of your head.
- Clip up the ponytailed hair. Divide the left out hair into half and weave each half into a braid.
- Wrap the ponytailed hair into a bun and pin it in place.
- Cross the braids over so that the left braid ends on the right side of the bun and vice versa. Pin the braids in place.
13. Messy Two-Minute Bun
What You Need
- Elastic bands
- Hair pins
What To Do
- Tie all your hair in a low ponytail with an elastic band.
- Part your hair in half right above the elastic band to create a gap.
- Flip the ponytail up and pass it through this gap.
- Roll the tail of the ponytail upwards and pin it up over that gap to finish off the formal hairstyle.
14. Messy Double Flipped-In Bun
What You Need
- Elastic bands
- Hair pins
What To Do
- Gather your hair in a low ponytail, leaving out some hair on the sides at the front.
- Flip the ponytail up and within itself right above the elastic band.
- Take the hair from both sides and tie it in a ponytail right over the first ponytail.
- Pass the second ponytail through the second ponytail right before the elastic band.
- Take all the hair in both the ponytails and tie their ends together with an elastic band.
- Flip the hair over and tuck the tied up ends within the first two ponytails. You can use pins to hold the bun in place. Lastly, use a medium-hold spray on these pins to keep the styling in place.
15. Messy Double Dutch High Buns
What You Need
- Elastic bands
- Hair pins
What To Do
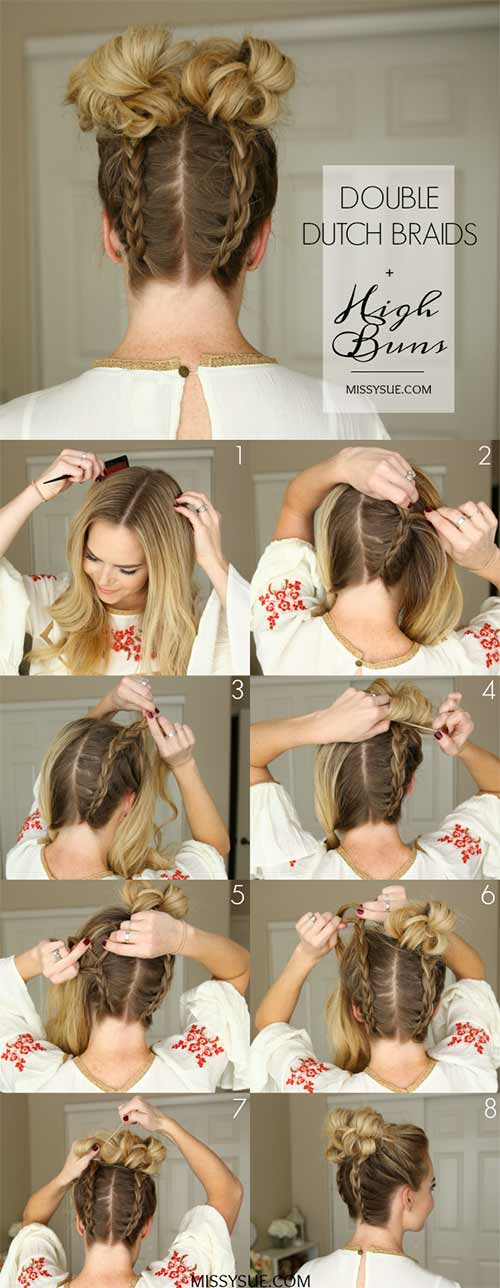
- Divide your hair in half from the front to the nape of your neck.
- Starting from the nape of your neck and moving upwards, weave the hair on the right side into a Dutch braid.
- Once you reach the crown, stop braiding your hair. Wrap the rest of your hair into a messy, loose bun. You can pancake your hair to make the bun look bigger.
- Repeat the same on the left side.
16. Messy Double Braid Bun
What You Need
- Elastic bands
- Hair pins
- Comb
What To Do
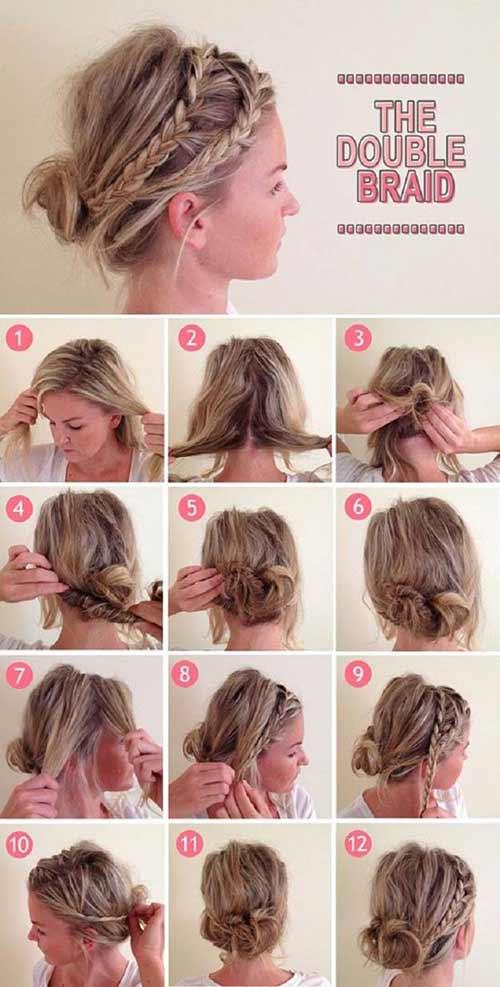
- Part your hair on one side.
- Section off some hair in the front.
- Divide your hair at the back in half.
- Twist one half and wrap it in a messy bun. Leave the ends to fall out.
- Repeat the same with the other half.
- Weave the side-parted hair you had left out in the front into two braids (one on each side).
- Pin both the braids above the bun, hiding the ends within it.
17. Messy Criss Cross Top Knot
What You Need
- Elastic bands
- Hair pins
What To Do
- Divide your textured hair into two parts: one top and another bottom half.
- Wrap the top half in a bun and pin it up. Divide the lower half into two parts.
- Take the right half and cross it over to the left side. Wrap the ends around the bun.
- Take the left section and cross it over to the right side. Wrap it around the bun.
- Repeat the same with the right section.
- Using pins, secure the hairdo in place.
18. Messy Twisted Top Knot
What You Need
- Texturizing spray
- Elastic bands
- Hair pins
- Hairspray
What To Do
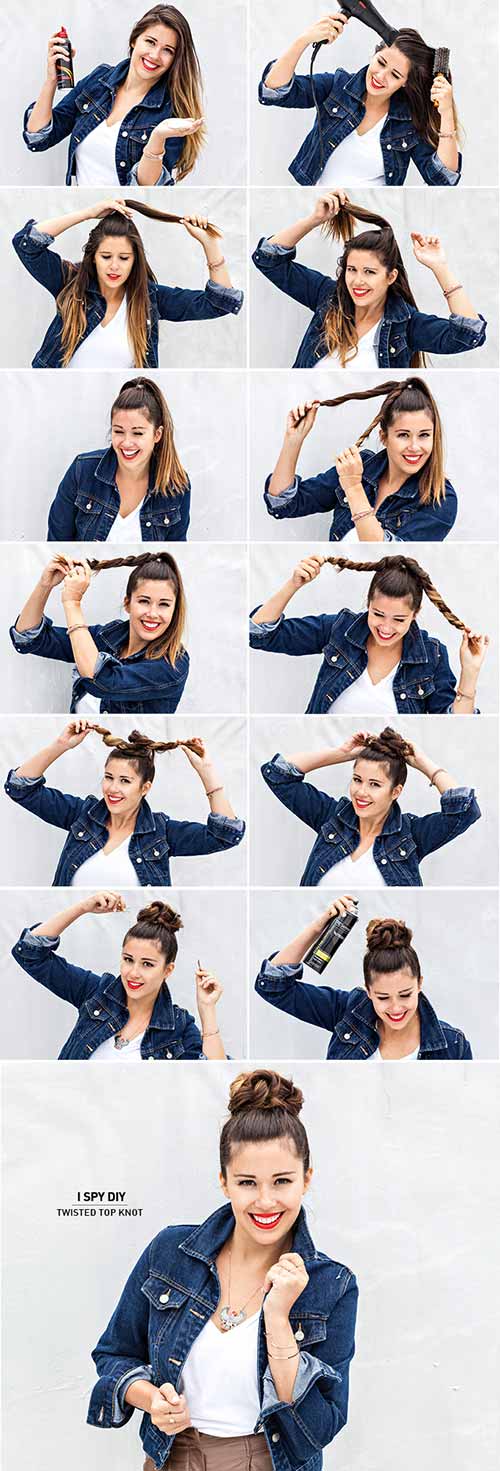
- Tie all your hair in a high ponytail and divide it in two.
- Twist both halves of the ponytail.
- Wrap the twists around each other to form a bun.
- Pin the bun in place and spritz on some hairspray.
19. Loose Messy Top Knot
What You Need
- Elastic bands
- Hair pins
- Comb
What To Do
- Detangle your hair with a comb.
- Tease your hair all over. This should make your hair look thicker.
- Gather all your hair, allowing a few strands to fall loose. You’ll notice a pouf form at the front.
- Hold your hair up and twist it lightly. Wrap your hair in a bun and secure it with an elastic band and hair pins.
- You can either add beachy waves, curls, loose strands or just leave them as they are.
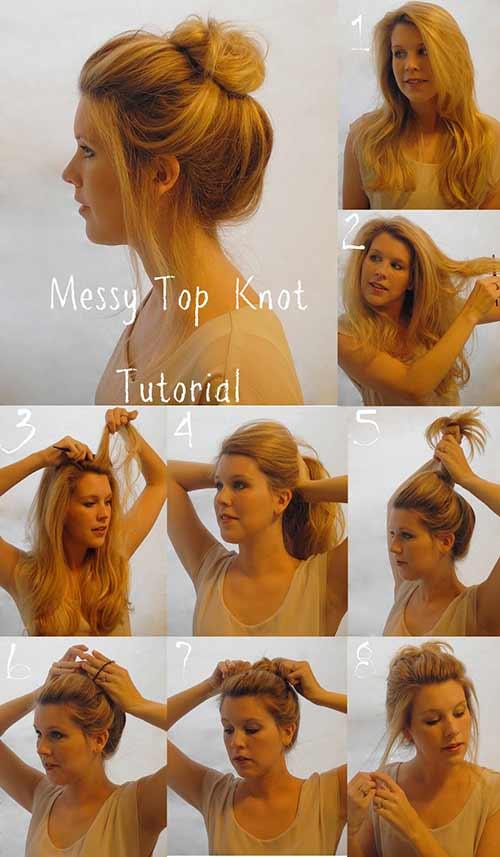
20. Messy Knotted Bun
What You Need
- Elastic bands
- Hair pins
What To Do
- Divide your hair into three sections: one large center section and two small side sections.
- Take the large center section and divide it in two.
- Tie a knot with both parts.
- Depending on how long or short your hair is, keep tying knots until you reach the end.
- Using pins, secure the knotted bun.
- Tie the two smaller side sections in a knot below the knotted bun.
- Again, depending on how long your hair is, keep tying knots until you are almost at the end.
- Pin the ends over the knotted bun.
Andrea, a blogger, recalls her personal experience of experimenting with a knotted messy bun for her ankle-length hair. She shares that while looking for a decent hairstyle, she happened to craft a knotted bun. “This morning I was running late but still wanted a decent hairstyle. I put my hair into a smooth ponytail, then made two or three sections and basically wadded them up into a messy bun held in place with three matching clips. This is a fun and fast hair-do for hectic mornings (i)!”
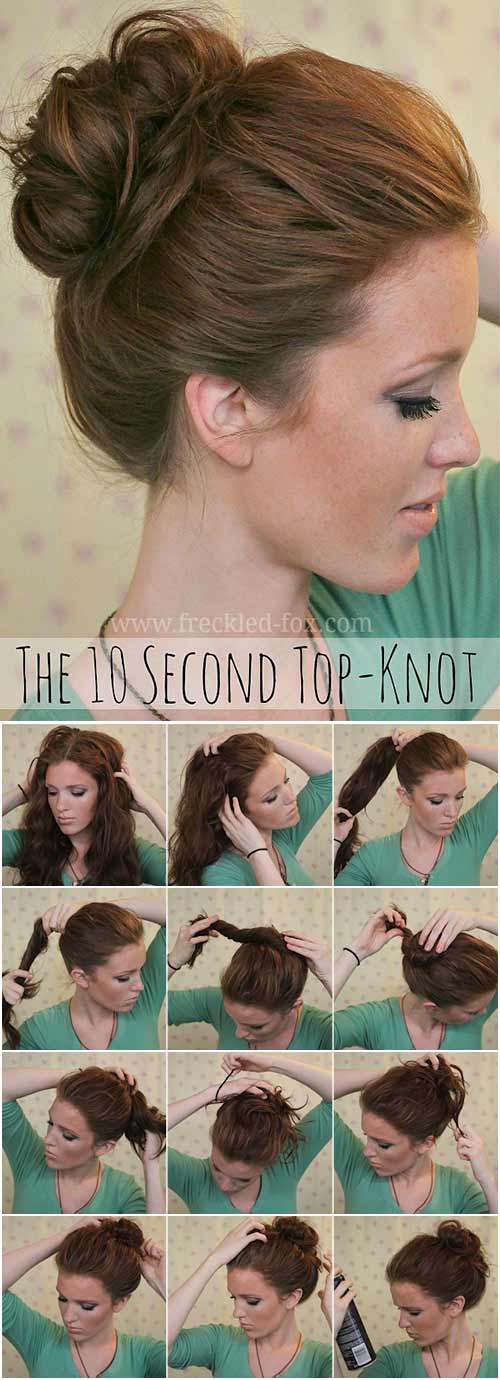
21. The 10-Second Top Knot
What You Need
- Elastic bands
- Hair pins
- Hairspray
What To Do
- Start off by messing your hair up.
- Gather all your hair and hold it in a high ponytail.
- Hold the base of the ponytail with one hand and hold your hair out with the other hand. Twist your hair.
- Wrap the twisted hair around to form a bun. Allow the ends to fall loose.
- Lift the bun higher to create a pouf.
- Secure the bun with an elastic band and some hair pins. This is a perfect wedding hairstyle that will ensure all eyes are on you!
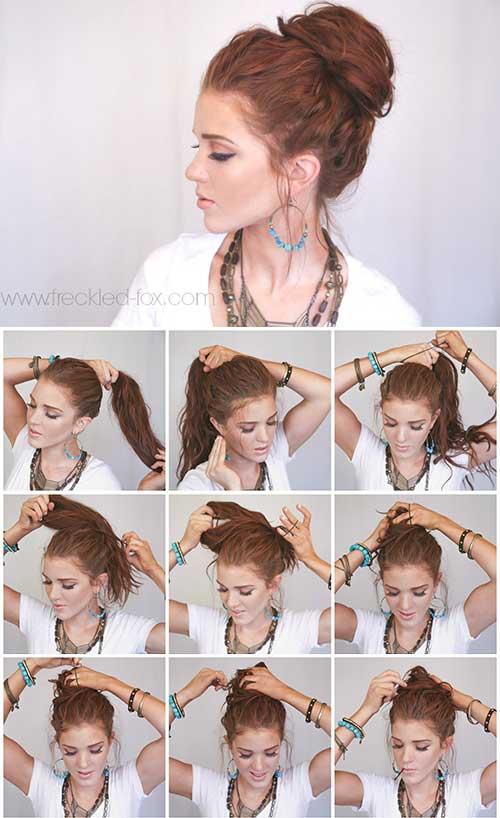
22. The Perfect Messy Bun
What You Need
- Elastic bands
- Hair pins
What To Do
- Gather all your hair and hold it in one hand like a high ponytail.
- With your other hand, pull out a few strands from the front hairline to frame your face.
- Hold one end of an elastic band at the base of the ponytail and pull the other side over your hair. Don’t pass all your hair through the elastic band. Leave out the ends. This forms a bun with the ends hanging free.
- Twist the elastic band and pass it over the bun a few times to secure it, allowing the loose ends to be tied in as well. You’ll notice that this messes up your hair.
- Secure the ends further in place with some bobby pins.
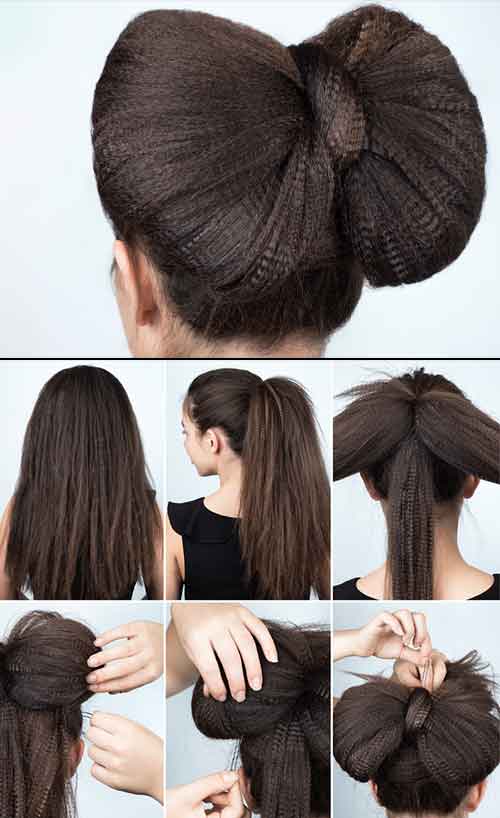
23. Bow Bun
What You Need
- Elastic bands
- Hair pins
- Light-hold hairspray
What To Do
- Start by brushing your hair to remove any tangles.
- Gather your hair into a high ponytail and secure it with an elastic band.
- Split the ponytail into two equal sections and create a loop with each section to form the bow shape.
- Use bobby pins to secure the loops in place, adjusting the size and shape of the bow as desired.
- Tuck the loose ends of your hair under the bow and secure them with additional bobby pins.
- You may loosen some strands to frame the sides of your face.
- Finish with a quick spritz of hairspray for a long-lasting bow bun free of flyaways.
 Quick Tip
Infographic: 8 Chic Ways To Flaunt A Messy Bun
The reason messy buns are a favorite amongst fashionistas is the effortless, cool air they have. It’s a look that can be pulled off by a college student as well as a runway model. Although not a formal look, you’d also find many office-goers resorting to messy bun hairstyles once all the formal events of the day are done. And you’d notice it somehow goes with the formal workplace attire too. While there are all these ways to make a messy bun, we have compiled our favorites into an infographic. Check out below. Illustration: StyleCraze Design Team
Looking at these 22 messy bun hairstyles, it comes as no surprise that this is a trending hairdo. Your hair is loose and messy yet beautiful. If you are not a pro at tying your hair in a messy top knot, try the hairstyles mentioned above. Then, you can add your own touch with hair accessories, hair colors, patterns, and braids. Make sure you follow a good hair care routine and also keep practicing these buns to become a hairstyling pro!From the messy knot bun to the perfect messy bun, pick your favorite and go!
Frequently Asked Questions
How do you do a messy bun with wet hair?
The messy bun can be done with wet hair by using a wave-enhancing hair spray. Spritz the spray, pull your lengths back into a bun, and secure it with a hair tie. Then, gently pull out some strands to give a messy look.
Is the messy bun out of style?
No, a messy bun is not out of style. It is a trend for many red carpet events and can give an elegant look to any dress.
Is a messy bun professional?
No, it depends on the business environment. A messy bun is typically not revered as a professional style. However, it can be a great fit for a party look.
Key Takeaways
- Messy buns are a trendy, effortless hairstyle that can be styled in various ways.
- Back-brushing or using texturizing spray adds volume and bounce to messy buns, especially for those with straight hair.
- Curling your hair first gives messy buns more body and texture.
- There are many ways to create messy buns, like twisted sides, knotted, wrapped, braided, flipped-in, double buns, and top knots.
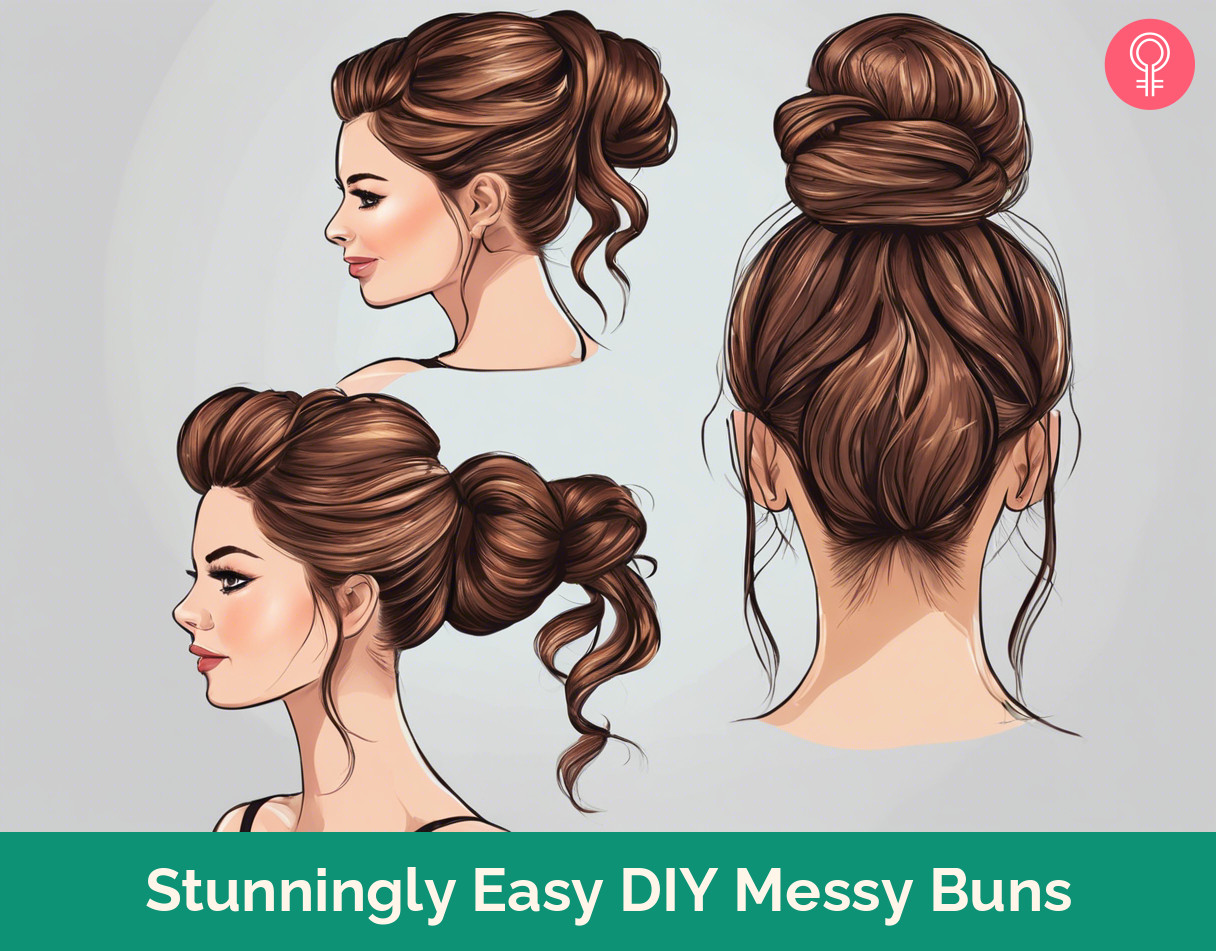
Image: Stable Diffusion/StyleCraze Design Team
Check out this bun tutorial to create a perfect messy bun. It is easy to follow and you will fall in love with the final results.
Personal Experience: Source
StyleCraze's articles are interwoven with authentic personal narratives that provide depth and resonance to our content. Below are the sources of the personal accounts referenced in this article.
i. 2 Minute Hairstyle- Messy Bunhttps://691superlonghair.blogspot.com/2013/09/2-minute-hairstyle-messy-bun.html

